Breadman Ultimate Manual: A Comprehensive Guide
Welcome! This manual provides detailed instructions and recipes for your Breadman Ultimate TR2200C bread maker.
Explore diverse baking options‚ from basic loaves to gourmet pizzas‚ and unlock the full potential of your appliance.
Discover troubleshooting tips and safety guidelines for a seamless baking experience.
This guide covers everything from initial setup to advanced techniques‚ ensuring delicious results every time.
Congratulations on acquiring the Breadman Ultimate TR2200C! This versatile bread maker is designed to simplify and elevate your home baking experience. It’s more than just a bread machine; it’s a culinary tool capable of crafting a wide array of baked goods‚ from traditional loaves to delectable pizzas and sweet treats.
The TR2200C boasts a user-friendly control panel and a range of pre-programmed settings‚ catering to both novice bakers and seasoned enthusiasts. Whether you’re aiming for a simple white bread‚ a hearty whole wheat loaf‚ or a flavorful rye creation‚ this machine delivers consistent results. Beyond bread‚ explore the dough-only cycle for homemade pasta‚ rolls‚ or even pizza dough – as demonstrated by the Rustic Pizza Margherita recipes available.
This manual serves as your comprehensive guide‚ walking you through each feature and function; We’ll cover initial setup‚ ingredient preparation‚ detailed recipes (including Caraway and Onion Rye variations‚ and Banana Granola Bread)‚ and essential maintenance procedures. Refer to resources like ManualsLib and user manuals for additional support and troubleshooting.
Understanding the Control Panel
The Breadman Ultimate TR2200C features an intuitive control panel designed for ease of use. Central to operation are the program selection buttons‚ allowing you to choose from pre-set cycles like Basic‚ Whole Wheat‚ Rye‚ Gluten-Free‚ Dough‚ and Sweet. Each cycle is optimized for specific ingredients and baking styles.
Key buttons include “Start/Stop‚” initiating and halting the baking process‚ and “Menu/Color Crust‚” enabling you to customize the crust’s darkness – from light to dark. The “Delay Timer” function‚ a valuable asset‚ allows you to schedule baking up to 13 hours in advance.
A digital display clearly indicates the selected program‚ remaining baking time‚ and any error messages. Familiarize yourself with the “+” and “-” buttons for adjusting cycle times or ingredient quantities. Refer to the manual for specific program durations and recommended settings. Understanding these controls unlocks the machine’s full potential‚ ensuring consistent and delicious results‚ whether crafting a simple loaf or a complex recipe like Banana Granola Bread.
Key Components and Their Functions
The Breadman Ultimate TR2200C comprises several essential components working in harmony. The non-stick baking pan is where the magic happens‚ ensuring easy loaf removal. The kneading paddle‚ crucial for dough development‚ is removable for cleaning. A heating element provides consistent and even baking temperatures.
The lid houses the viewing window‚ allowing you to monitor progress without interrupting the cycle. The ingredient dispenser automatically adds fruits‚ nuts‚ or seeds at the optimal time. The machine’s exterior features a durable housing and a convenient carrying handle.
Understanding each component’s role is vital for optimal performance. Regularly inspect the kneading paddle for wear and ensure the baking pan is securely in place. Proper maintenance‚ including cleaning the heating element area‚ extends the machine’s lifespan. These components‚ when functioning correctly‚ guarantee consistent results‚ whether baking a rustic pizza margherita or a simple white bread.
Initial Setup and First Use
Before your first bake with the Breadman Ultimate TR2200C‚ unpack all components and remove any protective packaging. Thoroughly wash the baking pan and kneading paddle with warm‚ soapy water‚ then dry completely. Wipe down the machine’s exterior with a damp cloth.
Place the bread maker on a stable‚ level surface‚ ensuring adequate ventilation around the unit. Plug the machine into a grounded electrical outlet. It’s recommended to run a test cycle without ingredients. Select a basic cycle and allow it to complete – this burns off any manufacturing residue.
Familiarize yourself with the control panel. A brief test run helps ensure everything is functioning correctly before committing to a full recipe. This initial setup prepares your machine for consistent‚ delicious results‚ whether you’re crafting a banana granola bread or a simple loaf.
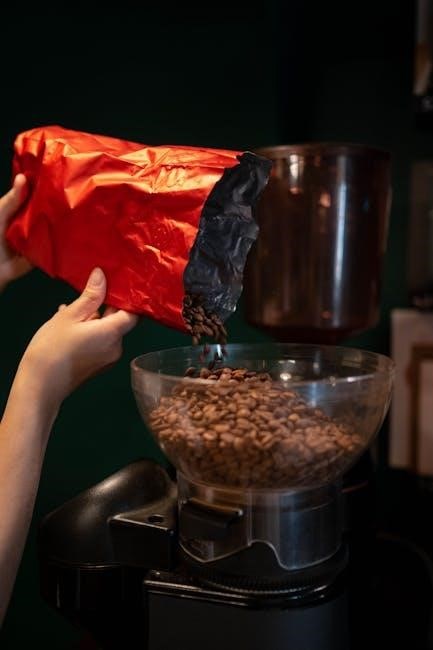
Preparing Ingredients for Bread Making
Successful bread making with your Breadman Ultimate TR2200C relies on accurate ingredient preparation. Always measure ingredients carefully‚ using dry measuring cups for flour‚ sugar‚ and dry milk‚ and liquid measuring cups for water and oil. Level off dry ingredients for precision.
Yeast is crucial; ensure it’s fresh and properly activated. Instant yeast can be added directly to dry ingredients‚ while active dry yeast may require proofing in warm water with a pinch of sugar. Liquids should be lukewarm – too hot can kill the yeast‚ too cold hinders activation.
Ingredient order matters! Generally‚ liquids go in first‚ followed by dry ingredients‚ with yeast added last. This prevents premature activation. For optimal results‚ use room temperature ingredients unless a recipe specifies otherwise. Proper preparation guarantees a consistent rise and a flavorful loaf.
Basic White Bread Recipe
This recipe is perfect for beginners using the Breadman Ultimate TR2200C. It yields a classic‚ soft white loaf. You’ll need 1 ¼ cups warm water (80-85°F)‚ 2 ½ teaspoons active dry yeast‚ 1 tablespoon sugar‚ 1 ½ teaspoons salt‚ 3 tablespoons softened butter‚ and 3 ½ cups bread flour.
Instructions: Add water‚ yeast‚ and sugar to the bread pan. Let stand for 5 minutes to proof the yeast. Add salt‚ butter‚ and flour. Select the ‘Basic’ cycle and crust color preference. Press start. The cycle will handle kneading‚ rising‚ and baking automatically.
Once the cycle completes‚ carefully remove the loaf from the pan using oven mitts. Let it cool on a wire rack for at least 30 minutes before slicing. Enjoy your freshly baked bread! Experiment with adding herbs or seeds for variations.
Whole Wheat Bread Recipe
Enjoy a nutritious and flavorful loaf with this Whole Wheat Bread Recipe for your Breadman Ultimate TR2200C. You’ll require 1 ¼ cups warm water (80-85°F)‚ 2 teaspoons active dry yeast‚ 1 tablespoon honey‚ 1 ½ teaspoons salt‚ 2 tablespoons vegetable oil‚ and 2 cups whole wheat flour combined with 1 ½ cups bread flour.
Instructions: Begin by adding water‚ yeast‚ and honey to the bread pan. Allow a 5-minute rest for yeast activation. Next‚ incorporate salt‚ oil‚ and both flours. Select the ‘Whole Wheat’ cycle and your desired crust color. Initiate the baking process by pressing ‘Start’.
Upon cycle completion‚ carefully extract the loaf with oven mitts. Allow it to cool completely on a wire rack before slicing. This bread pairs wonderfully with soups or as a hearty sandwich base. Feel free to add seeds or nuts for extra texture and flavor!
Rye Bread Recipes (Caraway & Onion)
Explore the robust flavors of rye with these two delightful recipes for your Breadman Ultimate TR2200C. First‚ the Caraway Rye: Combine 1 ¼ cups warm water‚ 2 tsp yeast‚ 1 tbsp molasses‚ 1 ½ tsp salt‚ 2 tbsp oil‚ 1 ½ cups rye flour‚ and 1 ½ cups bread flour‚ plus 1 tbsp caraway seeds. Select the ‘Rye’ cycle and bake.
Next‚ the Onion Rye: Use the same base ingredients‚ but substitute ½ cup of finely chopped sautéed onion for ½ cup of bread flour. Add 1 tsp of onion powder for enhanced flavor. Again‚ choose the ‘Rye’ cycle.
For both recipes‚ ensure ingredients are added in the order recommended by your machine. Upon completion‚ cool completely before slicing. These rye breads are excellent with cheeses‚ deli meats‚ or enjoyed simply with butter. Experiment with different toppings to personalize your loaf!

Gluten-Free Bread Baking
The Breadman Ultimate TR2200C offers a dedicated ‘Gluten-Free’ cycle‚ opening up a world of possibilities for those with dietary restrictions. Gluten-free baking requires a specialized blend of flours – rice flour‚ tapioca starch‚ and potato starch are common components. A binding agent‚ like xanthan gum‚ is crucial for structure‚ typically 1-2 teaspoons per loaf.
Begin with a pre-mixed gluten-free bread flour blend for consistent results. Add warm water‚ oil‚ sugar‚ salt‚ and yeast (ensure it’s gluten-free certified!). The ‘Gluten-Free’ cycle often has a longer rise time to accommodate the different flour properties.
Be aware that gluten-free bread may have a slightly different texture than traditional bread – it tends to be denser. Experiment with different recipes and flour combinations to find your perfect loaf. Cooling completely before slicing is essential for optimal texture.
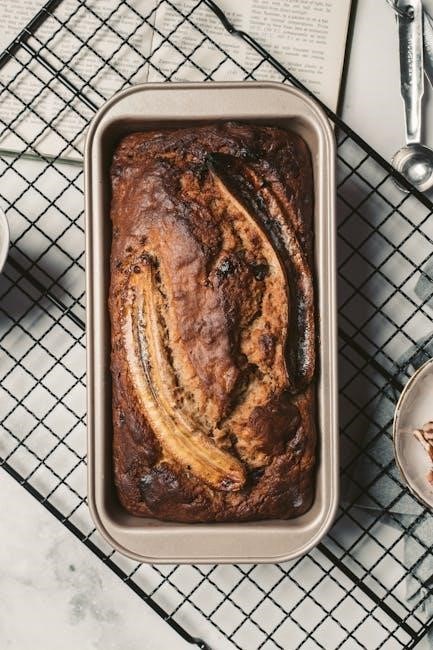
Sweet Bread Recipes (Banana Granola Bread)
The Breadman Ultimate TR2200C excels at creating delightful sweet breads‚ and Banana Granola Bread is a fantastic starting point. This recipe utilizes the ‘Sweet’ cycle‚ which adjusts kneading and rising times for enriched doughs. Begin with ripe bananas – the riper‚ the sweeter and more flavorful the bread!
Combine mashed bananas‚ melted butter‚ sugar‚ eggs‚ and vanilla extract. In a separate bowl‚ mix flour‚ baking soda‚ and salt. Gradually add the wet ingredients to the dry‚ then fold in your favorite granola for added texture and flavor.
Select the ‘Sweet’ cycle‚ adjust the crust color to your preference‚ and press start. The bread maker handles the rest! Allow the loaf to cool completely before slicing and enjoying. Experiment with adding chocolate chips‚ nuts‚ or spices for personalized variations.

Dough-Only Cycle: Mastering Dough for Various Uses
The Breadman Ultimate TR2200C’s ‘Dough’ cycle is incredibly versatile‚ allowing you to create dough for more than just bread. This cycle handles kneading and the first rise‚ leaving you with perfectly proofed dough ready for shaping and baking.
Simply add your ingredients – flour‚ water‚ yeast‚ salt‚ and any desired flavorings – to the bread pan. Select the ‘Dough’ cycle and let the machine work its magic. Once the cycle is complete‚ remove the dough and proceed with your chosen recipe.
This cycle is ideal for making pizza dough‚ rolls‚ bagels‚ pretzels‚ or even cinnamon rolls. You can then shape the dough‚ let it rise a second time (if needed)‚ and bake in a conventional oven. Mastering this cycle expands your baking possibilities beyond traditional loaves!
Pizza Dough Recipe (Rustic Pizza Margherita)
Yields: One 12-inch pizza crust
Cycle: Dough
Ingredients: 1 ¼ cups warm water‚ 1 tsp sugar‚ 2 ¼ tsp active dry yeast‚ 3 ½ cups bread flour‚ 2 tsp salt‚ 2 tbsp olive oil.
Instructions: Add water‚ sugar‚ and yeast to the bread pan. Let stand for 5 minutes. Add flour‚ salt‚ and olive oil. Select the ‘Dough’ cycle. Once complete‚ gently punch down the dough. On a lightly floured surface‚ stretch or roll the dough into a 12-inch circle.
Transfer to a pizza stone or baking sheet. Top with your favorite Margherita toppings: tomato sauce‚ fresh mozzarella‚ basil‚ and a drizzle of olive oil. Bake in a preheated oven at 450°F (232°C) for 12-15 minutes‚ or until golden brown and bubbly. Enjoy your homemade rustic pizza!
Using the Delay Timer Function
Convenience at Your Fingertips: The Breadman Ultimate TR2200C’s delay timer allows you to schedule bread baking up to 13 hours in advance. Imagine waking up to the aroma of freshly baked bread!
How to Use: First‚ add all ingredients to the bread pan as per your chosen recipe. Press the ‘Timer’ button. Use the ‘Hour’ and ‘Minute’ buttons to set the desired delay time. Note that the delay time does not include the baking time. Press ‘Start’ to activate the timer.
Important Considerations: Avoid using perishable ingredients like milk or eggs if the delay is extensive‚ especially in warmer environments. For best results‚ keep the ambient temperature consistent. The machine will automatically begin baking at the programmed time‚ delivering fresh bread exactly when you want it. Enjoy the flexibility!
Cleaning and Maintenance
Keeping Your Breadman Pristine: Regular cleaning ensures optimal performance and longevity of your Breadman Ultimate TR2200C. Always unplug the machine before cleaning!
Essential Steps: After each use‚ remove the bread pan and kneading paddle. Wash them with warm‚ soapy water‚ and thoroughly dry them before reinserting. Wipe the machine’s exterior with a damp cloth. Never immerse the main unit in water.
Deep Cleaning: Periodically‚ inspect the heating element for crumbs. Gently brush them away. Avoid abrasive cleaners‚ as they can damage the non-stick coating. Ensure all parts are completely dry before reassembling. Proper maintenance prevents buildup and ensures consistently delicious results. A clean machine is a happy machine!
Storage: Store your Breadman in a cool‚ dry place when not in use.
Troubleshooting Common Issues
Addressing Baking Challenges: Encountering issues? This section helps resolve common problems with your Breadman Ultimate TR2200C.

Loaf Not Rising: Ensure yeast is fresh and properly activated. Check ingredient measurements – accuracy is key! Room temperature can also affect yeast activity.
Collapsed Loaf: Excessive liquid or too much yeast can cause collapse. Reduce liquid slightly or use less yeast in future attempts.
Paddle Stuck in Bread: Allow the loaf to cool completely before removing. If still stuck‚ gently twist and pull.
Error Messages: Consult the manual for specific error code meanings. Often‚ these indicate a power surge or sensor issue. If problems persist‚ contact customer support for assistance. Remember to always double-check your settings and ingredients!
Safety Precautions
Important Safety Guidelines: To ensure safe operation of your Breadman Ultimate TR2200C‚ please adhere to these precautions. Always unplug the appliance before cleaning or when not in use.
Hot Surfaces: The bread maker’s exterior and interior become hot during operation. Use oven mitts when handling the bread pan or removing the loaf. Avoid touching hot surfaces directly.
Electrical Safety: Do not immerse the appliance‚ cord‚ or plug in water or other liquids. Ensure the power cord is not damaged and avoid using extension cords.
Proper Ventilation: Operate the bread maker on a stable‚ heat-resistant surface with adequate ventilation. Do not block the vents.
Supervision: Close supervision is necessary when the appliance is used near children. Never leave the bread maker unattended during operation. Always prioritize safety when enjoying freshly baked bread!
Recipe Customization and Experimentation
Unleash Your Inner Baker! The Breadman Ultimate TR2200C isn’t just about following recipes; it’s about creating your own! Feel free to adjust ingredient quantities to suit your taste. Experiment with different flours – try spelt‚ kamut‚ or even a blend.
Flavor Enhancements: Add herbs‚ spices‚ cheeses‚ or dried fruits to personalize your loaves. A tablespoon of honey or maple syrup can add sweetness. Don’t be afraid to try different extracts like vanilla or almond.
Dough Adjustments: If your dough seems too wet‚ add flour one tablespoon at a time. If it’s too dry‚ add water‚ also one tablespoon at a time. Careful observation is key.
Record Your Successes: Keep a baking journal to note your modifications and results. This will help you refine your recipes and consistently bake delicious‚ customized bread. Embrace the creative process and enjoy the journey!
Advanced Baking Techniques
Beyond the Basics: Once comfortable with basic recipes‚ explore advanced techniques with your Breadman Ultimate TR2200C. Consider utilizing the “Dough Only” cycle to create artisan-style breads requiring hand-shaping and oven baking for a superior crust.

Sourdough Starter Integration: Experiment with incorporating a sourdough starter into your recipes for a tangy‚ complex flavor profile. Adjust liquid and flour ratios accordingly‚ as starters contribute moisture and fermentation.
Multi-Grain Mastery: Combine various grains and seeds – flax‚ sunflower‚ pumpkin‚ and more – to enhance nutritional value and texture. Pre-soaking grains can improve their digestibility and incorporation.

Temperature Control: Understanding ingredient temperatures impacts fermentation. Slightly warmed liquids can activate yeast more efficiently. Mastering these nuances unlocks truly exceptional baking results. Don’t hesitate to research and refine your skills!
Resources and Further Information
Expanding Your Baking Knowledge: For additional support and inspiration with your Breadman Ultimate TR2200C‚ several resources are available. ManualsLib (manualslib.com) provides a comprehensive digital version of your instruction manual‚ including detailed recipe guides and troubleshooting assistance.
Online Communities: Explore online forums and social media groups dedicated to bread making. Platforms like Pinterest (ie.pinterest.com‚ uk.pinterest.com) offer a wealth of recipes and user-shared tips. UserManual Wiki (usermanual.wiki) also hosts user guides and manuals.
Breadman Support: Contact Breadman’s customer support directly for specific inquiries or warranty claims. Refer to your warranty information for contact details. Remember to have your model number readily available.
Recipe Websites: Numerous websites specialize in bread machine recipes. Continuously learning and experimenting will elevate your baking skills and unlock the full potential of your appliance!

Warranty Information
Your Breadman Ultimate TR2200C Warranty: This section details the warranty coverage for your bread machine. Please retain this information along with your proof of purchase for future reference. The warranty period typically begins from the original date of purchase.

Coverage Details: The warranty generally covers defects in materials and workmanship under normal household use. It does not cover damage resulting from misuse‚ accidents‚ unauthorized repairs‚ or normal wear and tear. Specific terms and conditions apply; consult the complete warranty document included with your appliance.
Claim Process: To initiate a warranty claim‚ contact Breadman customer support. You will likely need to provide your model number‚ serial number‚ proof of purchase‚ and a detailed description of the issue.
Important Note: Unauthorized attempts to repair or modify the appliance will void the warranty. Always adhere to the safety precautions outlined in this manual to maintain warranty validity.