User Manual Crib: A Comprehensive Guide
Navigating crib ownership requires diligent attention to detail, ensuring both safety and longevity. This guide compiles essential information,
from assembly and maintenance to safety precautions and recall awareness, for a peaceful nursery environment.
Crib user manuals are indispensable resources for parents and caregivers, offering detailed guidance on safe and correct assembly, usage, and maintenance. These manuals, often brand-specific like Graco or Oxford Baby, provide crucial information beyond what’s immediately apparent. They detail component identification, step-by-step assembly instructions – often downloadable for convenience – and explain features like mattress height adjustments or drop-side mechanisms.
Understanding a crib’s manual isn’t merely about building furniture; it’s about prioritizing infant safety. Manuals outline adherence to established safety standards, proper crib placement guidelines, and warnings against potentially hazardous accessories like crib bumpers. Accessing these resources, whether in physical form or via online downloads, empowers you to create a secure sleep environment for your little one, minimizing risks and maximizing peace of mind.
Why Read the User Manual?
Ignoring a crib’s user manual is a significant safety risk. These documents aren’t simply assembly guides; they’re comprehensive safety instructions tailored to a specific model, like those from Graco or Oxford Baby. Manuals detail critical information regarding weight limits, proper component installation, and potential hazards associated with incorrect assembly.
Furthermore, manuals explain how to utilize all features safely – from adjustable mattress heights to conversion kits for toddler beds. They also provide essential maintenance advice, ensuring the crib remains structurally sound over time. Understanding recall information, often referenced within the manual or on manufacturer websites, is paramount. Reading the manual proactively safeguards your child, prevents accidents, and ensures compliance with safety regulations, offering invaluable peace of mind.
Understanding Crib Safety Standards
Crib safety is governed by stringent standards designed to minimize risks for infants and toddlers. The U.S. Consumer Product Safety Commission (CPSC) sets these regulations, focusing on structural integrity, hardware security, and entrapment hazards. Modern cribs must meet specific requirements regarding slat spacing, mattress support, and the absence of hazardous materials.
User manuals often reference these standards, explaining how the crib’s design complies with CPSC guidelines. Understanding these standards empowers parents to assess their crib’s safety and identify potential issues. Awareness of recalls, frequently detailed in manuals and online resources, is crucial. Prioritizing cribs that meet current safety standards, and diligently following the manufacturer’s instructions, is essential for creating a secure sleep environment for your child.

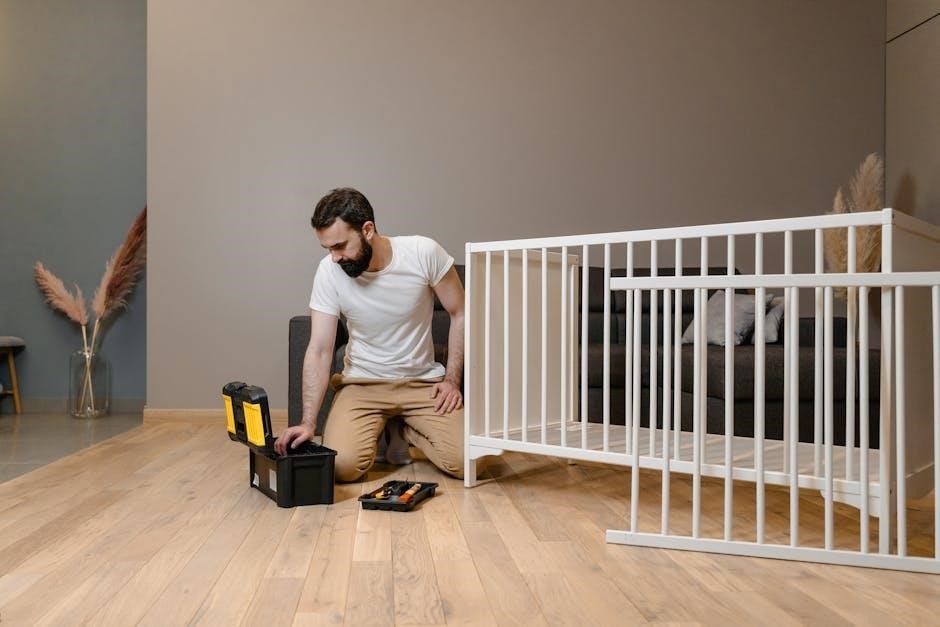
Crib Assembly
Proper crib assembly is paramount for safety and stability, demanding careful adherence to the user manual’s instructions and a thorough inventory of all parts.
Unboxing and Inventory
Begin by carefully unboxing all components of your crib, taking care not to damage any parts with sharp objects. Lay out all pieces on a protected surface – a drop cloth or cardboard works well – to prevent scratches.
Next, meticulously compare the physical parts against the parts list included in your user manual. Oxford Baby and Graco, for example, provide detailed lists.
Verify that you have every screw, bolt, washer, and wooden piece accounted for. Note any discrepancies immediately. Missing parts can halt assembly and potentially compromise safety.
Keep the packaging materials until assembly is complete, as they may be needed for returns or warranty claims. A thorough inventory upfront saves time and frustration later in the process.
Identifying Crib Parts
Familiarize yourself with each component before starting assembly. Cribs generally include headboards, footboards, side rails, and a mattress support system.
Refer to your specific crib’s manual – Graco and Oxford Baby manuals clearly label each part with diagrams. Distinguish between left and right side rails, as they are often not interchangeable.
Hardware is equally important to identify. Sort screws, bolts, and washers into separate piles. Note the different sizes and head types, as the manual will specify where each is used.
Pay close attention to specialized parts, such as drop-side mechanisms (if applicable) or conversion kit components. Accurate identification prevents incorrect assembly and ensures structural integrity.
Step-by-Step Assembly Instructions
Begin by attaching the side rails to the headboard and footboard, typically using bolts and washers. Ensure proper alignment before fully tightening – refer to diagrams in your Oxford Baby or Graco manual.
Next, install the mattress support system. This may involve adjustable height settings; select your desired level before securing it within the crib frame.
Double-check all connections, tightening each bolt and screw firmly but avoid over-tightening, which can damage the wood.
If your crib has a drop-side, carefully follow the manual’s instructions for installing and testing the mechanism. A secure and smooth operation is crucial for safety.
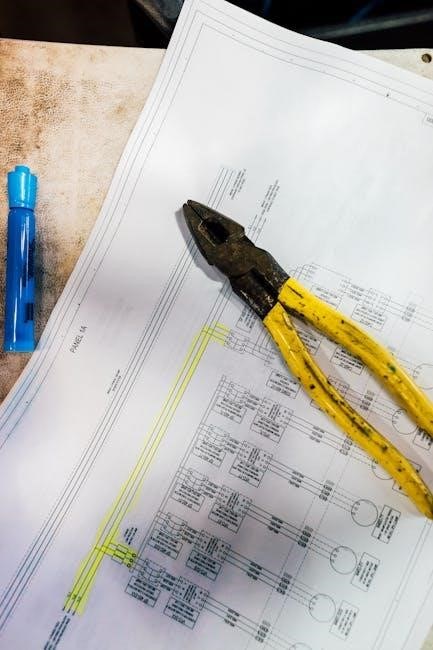
Tools Required for Assembly
Successful crib assembly necessitates a few essential tools. A Phillips head screwdriver is paramount, often for securing the majority of bolts and screws found in Graco or Oxford Baby cribs.
An Allen wrench set, frequently included with the crib, is vital for specific hardware. A rubber mallet can gently assist in joining wooden components without causing damage.
A level is crucial to ensure the crib stands evenly, preventing instability. Consider a power drill with adjustable clutch settings for faster assembly, but exercise caution to avoid stripping screws.
Finally, a soft cloth protects the crib’s finish during assembly, and measuring tape can be helpful for verifying component placement.

Crib Features and Adjustments
Modern cribs offer adjustable mattress heights and, sometimes, drop-side mechanisms. Conversion kits facilitate transitions to toddler beds, extending usability.
Mattress Height Adjustment
Adjusting the mattress height is a crucial feature for adapting to your baby’s developmental stages. Most cribs offer multiple height settings, typically three or four. The highest setting is ideal for newborns, keeping them safely away from the crib rails while preventing falls.
As your baby begins to sit and stand, lower the mattress to a middle setting. This reduces the risk of them pulling themselves up and tumbling out. Finally, when your child is standing consistently, the lowest setting provides maximum safety.
Always ensure the mattress is securely locked into the chosen position, verifying that it doesn’t shift or wobble. Refer to your specific crib’s manual for detailed instructions on how to adjust and secure the mattress height correctly. Proper adjustment is paramount for a safe sleep environment.
Drop-Side Mechanism (If Applicable)
Cribs with drop-side mechanisms, while once common, are now subject to stringent safety regulations and many have been recalled. If your crib does feature a drop-side, meticulous adherence to the manufacturer’s instructions is absolutely vital. Regularly inspect the mechanism for smooth operation and secure locking.
The drop-side should move effortlessly, yet lock firmly into both the up and down positions. Never force the mechanism, and immediately discontinue use if it feels stiff or unstable. Ensure the locking hardware is fully engaged whenever the side is either raised or lowered.
Due to safety concerns, many experts recommend avoiding drop-side cribs altogether. If you choose to use one, constant vigilance and thorough inspection are non-negotiable for your baby’s well-being.
Conversion Kits: From Crib to Toddler Bed
Many cribs are designed for longevity, offering conversion kits to transition from a safe infant sleep space to a toddler bed. These kits typically include lower side rails and sometimes a supporting slat system, adapting the crib’s structure for a growing child’s increased mobility.
Always use the conversion kit specifically designed for your crib model. Using an incompatible kit can compromise the bed’s structural integrity and create safety hazards. Carefully follow the manufacturer’s instructions during the conversion process, ensuring all parts are securely fastened.
Once converted, regularly inspect the toddler bed for loose hardware or any signs of instability. A secure and properly assembled toddler bed extends the usability of your crib and provides a comfortable transition for your little one.

Crib Maintenance and Care
Consistent upkeep is vital for a safe and durable crib. Regular cleaning, inspections for loose parts, and prompt hardware tightening ensure lasting quality.
Cleaning Instructions
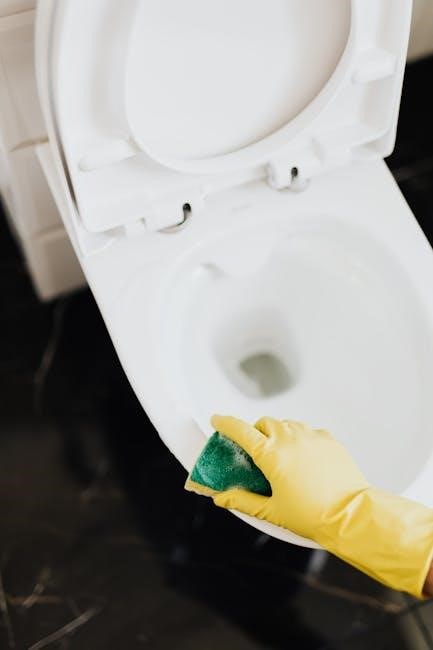
Maintaining a hygienic crib environment is crucial for your baby’s health. For routine cleaning, a damp cloth with mild soap is generally sufficient. Avoid harsh chemicals, abrasive cleaners, or bleach, as these can damage the crib’s finish and potentially harm your child.
Always ensure the crib is completely dry before placing a mattress or bedding back inside. For stubborn stains, a specialized wood cleaner designed for baby furniture may be used, following the manufacturer’s instructions carefully. Regularly wipe down the crib’s surfaces, including the rails, headboard, and footboard, to remove dust, dirt, and drool.
Pay close attention to areas where your baby frequently touches or mouths. Remember to disassemble any parts before deep cleaning, if possible, and always refer to the specific cleaning recommendations outlined in your crib’s user manual for optimal care and longevity.
Regular Inspection Checklist
Proactive crib inspections are paramount for ongoing safety. At least monthly, thoroughly examine all hardware – screws, bolts, and connectors – ensuring they remain tightly secured. Check for any signs of loosening, stripping, or damage. Inspect the crib’s structure for cracks, splinters, or breaks in the wood or finish.
Pay particular attention to the mattress support, verifying it’s firmly in place and level. Examine the drop-side mechanism (if applicable) for smooth operation and secure locking functionality. Ensure all moving parts operate freely without obstruction. Regularly assess the overall stability of the crib, gently rocking it to identify any wobbling or instability.
Document your inspections and any corrective actions taken. A consistent inspection routine helps identify and address potential hazards before they compromise your baby’s safety.
Tightening Loose Hardware
Addressing loose hardware promptly is crucial for maintaining crib stability. If you detect any wobbling or discover loose screws, bolts, or connectors during your regular inspections, immediately tighten them using the appropriate tools. Avoid over-tightening, as this can strip the threads or damage the wood.
Periodically, apply a small amount of wood glue to screw threads before re-inserting them for enhanced security. If a screw hole becomes stripped, consider using a slightly larger screw or a wood filler to create a secure anchor point. Regularly check the tightness of all hardware, especially after any adjustments or movements of the crib.
Keep a dedicated set of tools readily accessible for quick hardware adjustments. Consistent maintenance prevents minor issues from escalating into significant safety concerns, ensuring a secure sleep environment.

Safety Precautions
Prioritizing infant safety demands careful adherence to guidelines. Selecting a safe mattress, proper crib placement, and avoiding loose bedding are paramount for peaceful sleep.
Safe Mattress Selection
Choosing the right mattress is crucial for infant safety and comfort. A firm mattress is essential; soft mattresses pose a suffocation risk. Ensure the mattress fits snugly within the crib frame, leaving no gaps exceeding two fingers wide to prevent entrapment.
Look for mattresses that meet current safety standards, often indicated by certifications. Avoid used mattresses, as their history and potential for harboring bacteria or pests are unknown. Consider the mattress cover – it should be waterproof and easily removable for cleaning.
Regularly inspect the mattress for any signs of damage, such as tears or sagging. Always use a fitted sheet specifically designed for crib mattresses; avoid loose blankets, pillows, or bumper pads, as these increase the risk of Sudden Infant Death Syndrome (SIDS). Prioritize a breathable mattress to regulate temperature.
Proper Crib Placement
Strategic crib placement significantly contributes to a safer nursery environment. Position the crib away from windows, particularly those with cords from blinds or curtains, to eliminate potential strangulation hazards. Avoid placing the crib near radiators, heaters, or direct sunlight, as these can cause overheating.
Ensure the crib is stable and not easily accessible to climbing furniture like dressers or chairs; Maintain a safe zone of at least three feet around the crib, free from obstructions. Secure any nearby furniture to the wall to prevent tipping.
Consider the room’s traffic flow; minimize disturbances near the crib. Regularly check for loose wires or small objects that could pose a risk. A calm, quiet location promotes better sleep and reduces potential hazards for your baby.
Avoiding Crib Bumpers and Loose Bedding
Prioritizing a bare crib is paramount for infant safety, drastically reducing risks associated with sleep-related incidents. Experts strongly advise against using crib bumpers, as they pose suffocation and entanglement hazards. These seemingly soft additions can obstruct airflow and create dangerous gaps;
Similarly, avoid placing loose bedding – including blankets, pillows, and stuffed animals – within the crib. These items can cover the baby’s face, leading to suffocation. Opt for a fitted sheet specifically designed for the crib mattress, ensuring a snug and secure fit.
Dress your baby in appropriate sleepwear, such as a sleep sack, to maintain warmth without the dangers of loose materials. A minimalist crib environment is the safest environment.
Troubleshooting Common Issues
Addressing minor crib problems promptly ensures continued safety and functionality. Common concerns include squeaks, height adjustment difficulties, and occasionally, missing components.

Squeaking Noises
Squeaking sounds emanating from a crib are frequently a source of concern for new parents, but are often easily resolved. These noises typically originate from friction between wooden components, particularly during movement or weight shifts. The first step involves a thorough inspection of all screws, bolts, and connecting hardware, ensuring everything is securely tightened.
Lubricating joints with a small amount of beeswax or a specialized wood lubricant can effectively eliminate the squeak. Avoid using oil-based lubricants, as these can damage the wood finish. If the squeaking persists after tightening and lubrication, carefully examine the slats and side rails for any signs of rubbing. A thin felt pad strategically placed between contacting surfaces can also dampen the noise.
Remember to regularly check and maintain the crib’s hardware to prevent recurring squeaks and ensure a peaceful sleep environment for your baby.
Difficulty Adjusting Height
Encountering resistance when adjusting the mattress height on your crib is a common issue, often stemming from slightly misaligned components or accumulated dust and debris within the adjustment mechanisms. Begin by carefully reviewing the crib’s user manual for the specific height adjustment procedure for your model. Ensure you are following the correct sequence of steps.
If the adjustment latches or pins seem stuck, avoid forcing them, as this could damage the hardware. Gently try wiggling the mattress support while simultaneously attempting to release the latches. A vacuum cleaner with a brush attachment can help remove any obstructions hindering smooth movement.
If the problem persists, consider contacting the crib manufacturer’s customer support for assistance. They may offer specific troubleshooting advice or replacement parts if necessary.
Missing Parts – What to Do
Discovering missing parts during crib assembly can be frustrating, but it’s a resolvable issue. First, meticulously re-examine all packaging materials – sometimes smaller components are hidden within protective layers. Cross-reference the contents with the parts list detailed in your user manual to confirm exactly what’s absent.
Most manufacturers offer replacement parts free of charge. Contact the customer support team, providing your crib model number, purchase date, and a clear description of the missing component(s). Be prepared to potentially submit photos as proof.
Avoid using substitute parts not specifically designed for your crib, as this could compromise its structural integrity and safety. Patience is key; replacement parts typically arrive within a few business days.

Specific Crib Brand Manuals (Examples)
Accessing brand-specific manuals streamlines setup and maintenance. Graco and Oxford Baby offer downloadable guides, ensuring correct assembly and optimal safety features.
Graco Crib User Manuals
Graco provides comprehensive user manuals for their extensive crib lines, readily available online to assist parents with safe and efficient assembly. These manuals, like the ISPP046AC and ISPP020AB models, detail each step of the construction process, accompanied by clear diagrams.
Beyond assembly, Graco manuals cover crucial aspects of crib maintenance, including hardware tightening schedules and recommended cleaning procedures. They emphasize adherence to safety standards, outlining proper mattress selection and crib placement guidelines.
Digital access to these manuals is convenient, often found through archive.org or directly on the Graco website. The manuals are typically in English and are substantial in size (around 7.8MB), reflecting the detailed information provided. Always refer to the manual specific to your Graco crib model for accurate instructions.
Oxford Baby Crib Assembly Instructions
Oxford Baby prioritizes a smooth setup experience, offering detailed assembly instructions for both their cribs and complete nursery sets. These guides are designed to be easily followed, ensuring parents can safely and efficiently construct their baby’s sleep space.
The instructions typically feature clear, step-by-step guidance, often accompanied by illustrative diagrams to visualize each stage of the assembly process. Oxford Baby emphasizes the importance of carefully reviewing all parts lists before beginning construction.
These resources are readily downloadable from the Oxford Baby and Kids website, providing convenient access for new parents. Proper assembly is paramount for safety, and Oxford Baby’s instructions aim to minimize errors and maximize stability, creating a secure environment for your little one.

Crib Recall Information
Staying informed about potential recalls is crucial for infant safety; regularly check official sources and report any concerns immediately to ensure a secure sleep environment.
Checking for Recalls
Proactive recall checks are paramount to safeguarding your child. The Consumer Product Safety Commission (CPSC) website (www.cpsc.gov) is the primary resource for current and past crib recalls. Regularly visit this site and search by brand name or model number. Additionally, manufacturers like Graco often post recall information directly on their websites, providing detailed instructions and contact information for affected customers.
Registering your crib with the manufacturer can also provide direct notification of any safety concerns or recalls. Many brands offer online registration forms. Furthermore, consider signing up for email alerts from the CPSC to receive immediate updates on product safety issues. Thoroughly inspect your crib against recall descriptions, paying close attention to model numbers and manufacturing dates. Don’t hesitate to contact the CPSC or the manufacturer if you suspect a potential issue.
Reporting a Safety Concern
If you identify a potential safety hazard with your crib, immediate reporting is crucial. Contact the Consumer Product Safety Commission (CPSC) directly through their website (www.cpsc.gov) or by calling their hotline. Provide detailed information, including the crib’s brand, model number, date of manufacture, and a comprehensive description of the safety concern.
Document the issue with photographs or videos to support your report. Simultaneously, notify the crib manufacturer; their contact information is typically found in the user manual or on their website. Keep records of all communication with both the CPSC and the manufacturer, including dates, names of representatives, and summaries of conversations. Your report contributes to broader safety monitoring and can prevent injuries to other children. Prompt action can save lives.
Resources for Recall Information
Staying informed about crib recalls is paramount for your child’s safety. The Consumer Product Safety Commission (CPSC) website (www.cpsc.gov) is the primary resource for official recall announcements and safety alerts. You can sign up for email alerts to receive notifications directly. Additionally, the Juvenile Products Manufacturers Association (JPMA) offers a recall database on their website (www;jpma.org).

Retailers like Graco and Oxford Baby often post recall information on their respective websites. Regularly check these sources, especially if you own a crib from these brands. Websites dedicated to product safety, such as Recall.org, compile recall information from various sources. Thoroughly research your specific crib model number to determine if it’s been subject to any recalls, ensuring a secure sleep environment for your baby.